The Tag and Nuke
The Tag
The Tag feature allows setting up a reminder for an assigned production task or command, which requires action, and which will appear on the designated date.
A tag, set up in an appropriate way, will warn the performer of an action required for the task or command befor the Target Date. At the same time, the task will not remain open in the user’s Inbox for a protracted period.
Both the owner and the performer can tag an item, indicating that it needs to be completed before the Target Date.
Tagged tasks and commands are added to the Tagged Date Action List.
There are three ways of item tagging:
1. Tagging an item by an owner while creating a new item.
2. Tagging an item by a performer while reading the item in the Assigned To Me Tasks folder.
3. Tagging an item by a performer from the Overall Inbox folder (the item has not been opened or viewed).
Tagging an item by an owner while creating a new item:
1. Under the Create menu, click Create new Production Task or Create new Command.
2. In the Assigned to text box, select a user the task or command is supposed to be assigned to (a performer of the task).
3. In the Target date text box, specify the date and time until when the task must be finished.
4. In the New Production Task or New Command window, click Tag.
5. The Assign a Tag Date and the Calendar text boxes appear.
Note: The Calendar text box appears after a performer of the task is selected.
6. In the Assign a Tag Date box, select the date and time the tag will warn a performer of an action required for the task or command.
7. To add the tagged item to the performer`s calendar, select the Calendar check box.

In the Tag Start field, select the day and time when a tagged item is supposed to warn a performer before the target date. In the Tag End field, select the day and time when the Tag must be shown to the performer last time.
Note: To remind the performer of approaching task date, select the Alert before check box. Then, click the arrow next to the Alert before field and select the time interval indicating the period since when you want the alert to appear till the task deadline.

8. In the text editor, type a message concerning the task content.
9. In the Subject field, specify the subject of the production task.

10. Click Send.
The task appears in the performer`s Overall inbox and the Production Items Assigned To Me folders.

To tag an item by a performer while reading an item in the Assigned To Me Tasks folder:
1. Right-click an item you want to be tagged.
Tip: You can tag a production task or a command only. A Plan cannot be tagged.
2. On the shortcut menu, click Tag.

The Schedule Item Into The Calendar window appears.
The Schedule Item Into The Calendar window contains a Line Calendar with three sliders. Line Calendar is a unique TimeMaker feature that shows you the information regarding the task you want to tag. It contains three sliders: Start Date, Tag Start, Target Date.
Start Date - shows the date the task starts.
Tag Start - shows the date the tag starts.
Target Date - shows the deadline for the task.
Tip: Drag a slider to change any of the described above date.
3. Click an appropriate option button to set the desired date to have TimeMaker display tag to the performer.

There are four option buttons on the Tag form:
Target Date - Select this option button to have TimeMaker display the tag to the performer on the day when the task must be finished.
One Day Before Target Date - selecting this option button, you have TimeMaker display the tag to the performer the performer one day before the day when the task must be finished.
Start Date - selecting this option button, you have TimeMaker display the tag to the performer on the day when the task must be started.
Custom - selecting this option button, you have TimeMaker display the tag to the performer on the day you set.
To set the tag date manually, in the Tag Start field, select the day and time when a tagged item is supposed to warn the performer before the target date. In the Tag End field, select the day and time when the tag must be shown to the performer for the last time.

4. If you do not want the tagged item to be shown in your Overall Inbox folder, select the Hide from Inbox check box.
5. The item will be temporarily moved to the Tag Items out of Inbox folder and will appear in the performer`s Overall Inbox on its tagged date.

6. If you want the tagged item to be added to your calendar, select the Put into Calendar check box.

The tagged item appears in your TimeMaker Calendar.

Note: To remind the performer of an approaching task deadline, select the Alert beforeAlert before field and select the time interval indicating the period since when you want the alert to appear till the tag end. check box. This setup is usually performed before the task begins. Click the arrow next to the

7. Click Send.
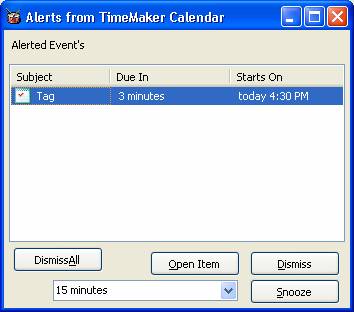
The Alerts from TimeMaker Calendar window will appear on the tag start date:
To tag an item by a performer from the Overall Inbox folder (item has not been opened or viewed):
1. Right-click an item you want to be tagged.
2. On the shortcut menu, click Tag.
3. Click an appropriate option button, to set the desired date to have TimeMaker display the tag to the performer.

There are four option buttons on the Tag window:
Target Date - selecting this option button, you make the tag be displayed to the performer on the day when the task must be finished.
One Day Before Target Date - selecting this option button, you make the tag be shown to the performer one day before of the day when the task must be finished.
Start Date - selecting this option button, you make the tag be shown to the performer on the day when the task must be started.
Custom - selecting this option button, you make the tag to be shown to the performer on the day you preset.
To set the tag date manually, in the Tag Start field, select the day and time when the tagged item is supposed to warn the performer before the target date. In the Tag End field, select the day and time when the tag must be shown to the performer for the last time.
4. If you do not want the tagged item to be shown in your Overall Inbox folder, select the Hide from Inbox check box.
5. The item will be temporarily moved to the Tag Items out of Inbox folder and will appear in the performer`s Overall Inbox on it`s tagged date.
6. If you want the tagged item to be added to your calendar, select the Put into Calendar check box.
7. The tagged item appears in your TimeMaker Calendar.
Note: To remind the performer of an approaching task deadline, select the Alert before check box. This setup is usually performed before the task begins. Click the arrow next to the Alert before field and select the time interval indicating the period since when you want the alert to appear till the tag end.
8. Click Send.
The Nuke
The word Nuke originates from the word Nuclear. This type of action allows the Owner of the task to have control over a TimeMaker item that has not being handled by its Performer on time.
The Nuke action refers to two classes of actions the Owner of an item can perform.
Owner`s Tag date and Nuke
The Owner`s Tag date is visible only for the task owner. This feature allows the Owner of the task to remove a production task or a command out of his????folder for a specific period of time giving extra time for the performer to handle the task.
The Nuke allows to communicate with the performer and to demand an action from him/her concerning the overdue task.
Owner`s Tag
The Owner`s Tag feature allows the Owner of a production task or a command to move an overdue item from the Owner`s Overall Inbox to the Production Items Assigned By Me folder.
The item will reappear in the owner`s Overall Inbox folder at the Owner tag date.
Note: The Owner Tag feature does not change the Target Day of a production task or a command.
The item remains overdue and has a red color in the Performer`s Overall Inbox and in the Performer`s Production Items Assigned To me folders.
To add Owner`s tag date to an item in the Overall Inbox folder prior to opening the item:
1. In the Overall Inbox folder, right-click the overdue task you want to add an Owner`s Tag to.
2. On the shortcut menu, click Nuke.
3. On the Nuke form, select the Owner`s tag date check box, to enable the Owner`s tag date feature.
4. In the Owner`s tag date field, select the owner tag date.

5. Click Send.
Nuke
The Nuke feature allows the Owner of a production task or a command to inquire an action from the task performer or an immediate completion of the production task or command based on the type of the Nuke selected.
There are four types of the Nuke feature:
1. Diplomatic
2. Conventional
3. Bullet
4. Nuclear
Note: When an Owner sends a Nuke of any type, he/she opens a new communication in the Performer`s Overall Inbox folder.
1. When an owner sends a Nuke of the Diplomatic type, a new communication opens in the Performer`s Overall inbox folder.

A new line appears on the Detail tab of the Production Task.
The Performer will be allowed to close the communication.
The Performer is able to do the following actions: Close communication, Complete, Move Date, Clarify, Reject, Query, Data and Redirect.

Tip: To close a communication, right-click a communication you want to be closed, and then click Close communication.
When an Owner sends a Nuke of a Conventional type, a new communication opens in the Performer`s Overall inbox folder.

If the Performer closes the Nuke form, it will reappear in half a minute.
The Performer is able to do the following actions: Close communication, Complete, Move Date, Clarify, Reject, Query, Data and Redirect.
Tip: To close a communication, right-click a communication you want to be closed, and then click Close communication.

When an owner sends a Nuke of the Bullet type, a new communication opens in the Performer`s Overall inbox folder.
The Nuke form appears on the performer`s display.
The Performer is able to do the following actions: Complete, Date Move, Reject, Clarify, Query and Data.
If the performer closes the Nuke window, it will reappear in half a minute.
When the owner sends a Nuke of the Nuclear type, a new communication opens in the Performer`s Overall inbox folder.
The Nuke window appears at the Performer`s display.
The Performer of the task is able to do only the following actions: Complete, Query, Data and Redirect.
To send a Nuke within the Actions panel:
The Actions panel displays all actions applicable for the selected task. There are two views of the Actions panel:
Simplified

Expanded

To expand the Actions panel, click Expand.

1. Select a task or a command you want to be nuked.

2. On the Actions panel, click Nuke.

The Nuke window opens.
3. On the Nuke form, click the Nuke type field and then select the Nuke type you need.
Nuke Performer
4. When the Nuke type is selected, click Send.
The Performer Actions for the Tag feature
The TimeMaker Action List allows moving dates, defining the tag date and sending a Nuke. All the actions mentioned above can be done by simply dragging tasks to the Action List and without the necessity to send messages.
To open the Action List panel:
1. In the e-mail module, under the View menu, click Show Action List.

The Action List panel appears on the right of the e-mail module.
2. You are allowed to find the task by its target date in the Calendar. Selecting a date in the Timemaker Calendar, you have the tasks displayed with the Target Date which meets the date you have selected in the Calendar.
3. Select the production task or command you want to apply the Tag Date action to.
4. Right-click the selected task or command and drag it to the desired date in the Calendar.
5. In the shortcut menu, select the appropriate action.
Note: You can select several tasks and drag them simultaneously. A selected action will be applied to all the tasks that have been selected.